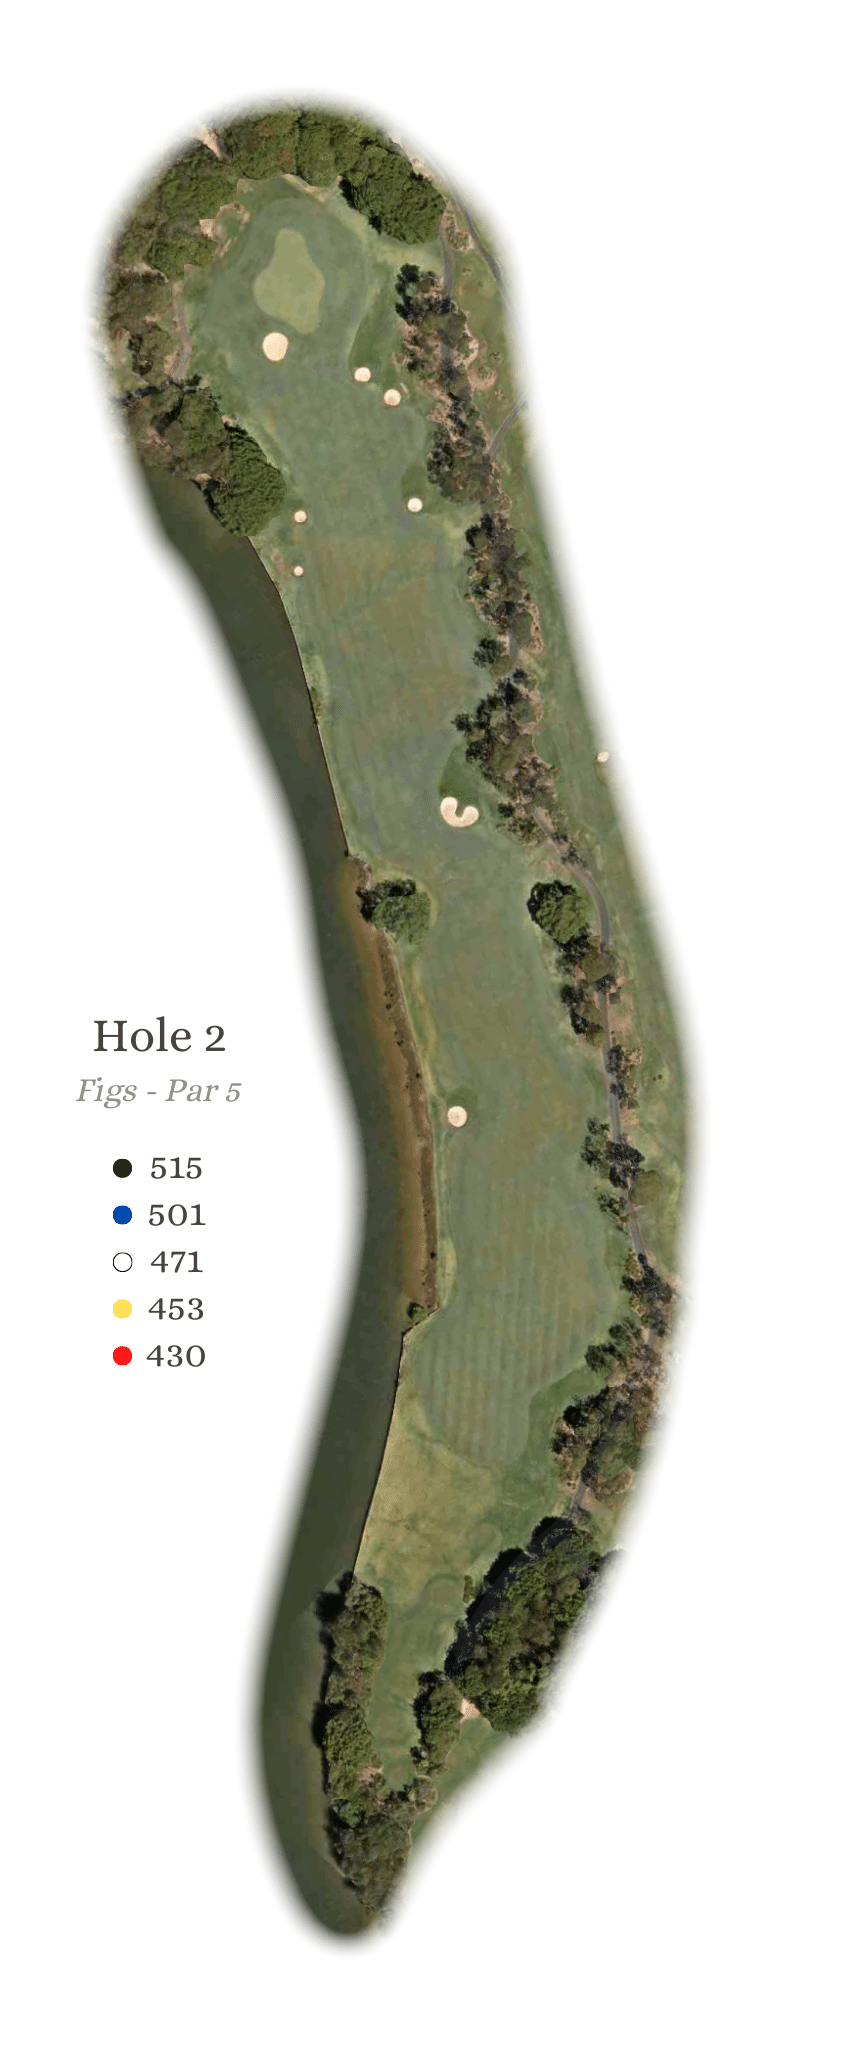
HOLE 2
515m, PAR 5
Now begins the real examination, because this is a hole only the mighty can reach in two, with the added difficulty of the green being raised and its area made smaller by a dangerous false front. The line from the tee is just right of the bunker guarding the left side of the fairway. Several well placed bunkers ensure concentration and strategy is also required for those laying up with their second shots, leaving a pitch to the raised green. Daily pin positions can dictate the best angle for the 3rd shot with those on the left half of the green better attacked from the right side.
Flyover distance markers from the blue tee
|
Blue |
501m |
|
White |
471m |
|
Red |
430m |